Guides
Signaling Workflows
Elsa comes with simple yet powerful signaling capabilities that allow you to send simple signals from and to workflows as well as from your application code.
You can thing of a signal as an event and consists of the following attributes:
- Signal Name
- Signal Payload
Workflow signals make it easy to publish a signal to multiple workflows or to signal a specific workflows, either via workflow instance ID or correlation ID.
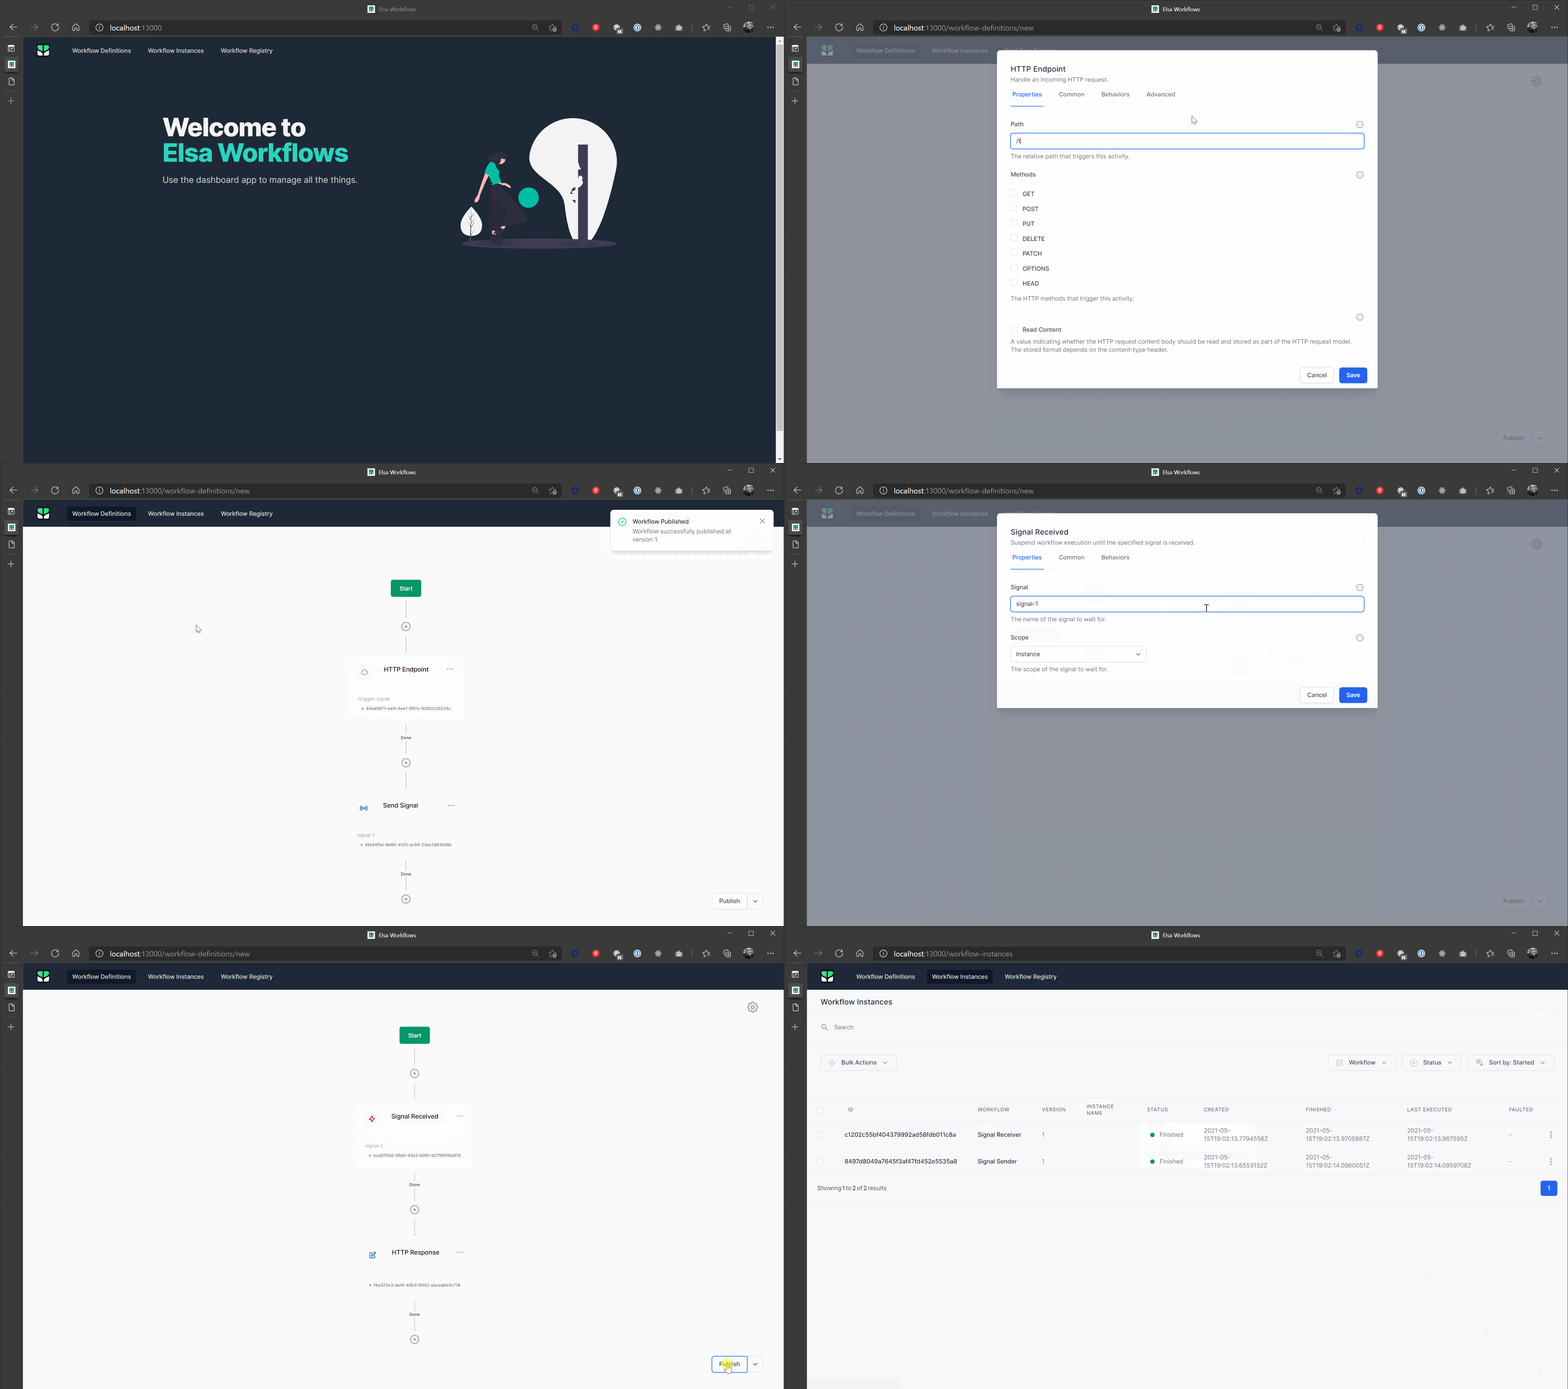
In this guide, we will take a look at setting up two simple workflows where one workflow sends a signal that is handled by the second workflow.
Run Dashboard
To follow this guide, make sure to run Elsa Dashboard. If you have Docker installed then running the following command is the quickest way to get started:
docker run -t -i -p 13000:80 elsaworkflows/elsa-dashboard-and-server:latest
This will start the Elsa Dashboard in a container which you can access from a web browser at http://localhost:13000.
Signal Sender Workflow
First, create a new workflow called Signal Sender and add the following activities:
- HTTP Endpoint
- Path:
/send-signal - Methods:
GET
- Path:
- Send Signal
- Signal:
signal-1
- Signal:
Publish the workflow.
Signal Receiver Workflow
Create another workflow called Signal Receiver and add the following activities:
- Signal Received
- Signal:
signal-1 - Scope:
Instance
- Signal:
- HTTP Response
- Content:
Signal 1 received!
- Content:
Publish the workflow.
Open a web browser and navigate to https://localhost:5001/send-signal.
You should now see the following response:
Signal 1 received!
The following animation shows everything scenario in action:
